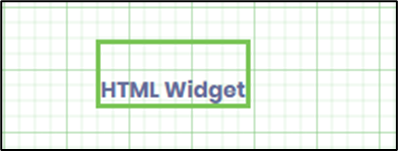
Description:
Use this widget on the Form to accept any HTML code and render it.
Inputs
- Name - Name of the widget generated by FlowWright
- Default Value - Provide the HTML code
- Hide - Select the checkbox to Hide (tick mark)
- Save - Save the input values
- Delete - Remove this form widget from the designer page
- Close - Close the input popup window
Design:

Example:
Let's build and execute the “HTMLWidgetDef” example
- Create a new Form definition called “HTMLWidgetDef.”
- Drag a “BootstrapGrid, HTML widget, Label, and Submit” control onto the canvas and arrange them as shown below.

- Double-click the “HTML Widget” to configure the “Settings” properties. A pop-up window appears for configuration. Enter the control name. Use the rich text toolbar to enter the HTML content. You may select the checkbox to hide the control at runtime. Click the Save button.

- You may also provide the HTML tags as content. Click the icon </> to enter the HTML data. Then click the Save button.

- Save the Form definition. Select Actions > Create Form Instance from the menu. Generate a new Form instance and select the check box to edit it.

- The Form is displayed to the user below.

- The HTML code sample is provided here for reference.
<!DOCTYPE html>
<html>
<head>
<title>May 2025 Calendar</title>
<style>
#calendar {
   width: 250px;
   margin: 20px auto;
   border-collapse: collapse;
}
#calendar th, #calendar td {
   border: 1px solid black;
   padding: 5px;
   text-align: center;
}
#calendar th {
   background-color: #f2f2f2;
}
</style>
</head>
<body>
<table id="calendar">
<thead>
<tr>
<th colspan="7">May 2025</th>
</tr>
<tr>
<th>Sun</th>
<th>Mon</th>
<th>Tue</th>
<th>Wed</th>
<th>Thu</th>
<th>Fri</th>
<th>Sat</th>
</tr>
</thead>
<tbody>
<tr>
<td></td>
<td></td>
<td></td>
<td></td>
<td>1</td>
<td>2</td>
<td>3</td>
</tr>
<tr>
<td>4</td>
<td>5</td>
<td>6</td>
<td>7</td>
<td>8</td>
<td>9</td>
<td>10</td>
</tr>
<tr>
<td>11</td>
<td>12</td>
<td>13</td>
<td>14</td>
<td>15</td>
<td>16</td>
<td>17</td>
</tr>
<tr>
<td>18</td>
<td>19</td>
<td>20</td>
<td>21</td>
<td>22</td>
<td>23</td>
<td>24</td>
</tr>
<tr>
<td>25</td>
<td>26</td>
<td>27</td>
<td>28</td>
<td>29</td>
<td>30</td>
<td>31</td>
</tr>
</tbody>
</table>
</body>
</html>
Definition Sample:
You may download the sample definition(s) from the link provided and later import them (drag-and-drop) into your FlowWright Process Definition (XML file) or Form Definition (HTML file) page.
Note: Please verify and complete the process steps for any missing configurations, such as file path references and database connections, after the import. Then, save the definition to confirm the changes.