Description:
This step invokes a FlowWright Microservice.
Inputs
- selMicroService: Select microservice from dropdown.
- ParamsMapping: Mapping of inputs & output params fields.
Returns
- True – step executed successfully
- False – step failed to execute
Usage:

Example:
Let's build and execute the “Add2NosDef” to sum two numbers, for example.
- Create a new process definition named “Add2NosDef” and open it in designer mode.
- Drag an "evalExpression" step to the canvas.
- Connect the dots between the “Start” and “evalExpression” steps, as shown above.
- Define a variable or a global to store the result.
- Click the “evalExpression” step to configure its “Required” properties. Provide a name for the step, the expression to evaluate, and a variable or global reference to store the result. Click the Save button. Note: Click the "AI Predict" button for the Copilot to add new process steps that match your process description.

- Save the process definition, create a new instance, and then execute it. The process step should perform the “evalExpression” step and store the result in the configured variable or global.
Let’s build a microservice, “Sum2NosWithAuthentication," for example.
- Navigate to the Integration - Microservices page.

- Click the Actions - Create menu option to create a microservice. Provide a name and a description for the microservice. Configure the HTTP method, Authentication, and Logging function as shown below. Select the process definition “Add2NosDef” from the drop-down list. Set the Process Instance to “ON” to save the instance. Select the Variables or Globals filter to map the input values. Provide the variable or global name and description. Click the Add button to confirm. You may repeat this step to include additional input variables or globals. Likewise, select the Variables or Globals filter to map the output values. Provide the name and description for the variable or global. Click the Add button to confirm. You may repeat this step to include additional variables or globals for the output. Click the Save button to confirm.

You must build the microservice before using it. On the Manage Microservice page, select the microservice from the list, then click the API - Build menu option. The microservice builds in the background, and the application restarts. You'll need to log in again to continue. Build log errors are available via the Build Log menu option.

Let’s build and execute the “clsMicroServiceDef” step example.
- Create a new process definition named “clsMicroServiceDef” and open it in designer mode.
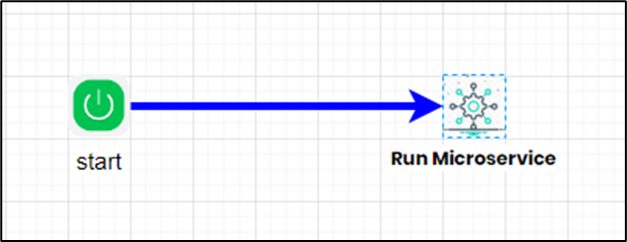
- Drag a "clsMicroService" step to the canvas.
- Connect the dots between the “Start” and “clsMicroservice” steps, as shown below.
- Click the “clsMicroService” step to configure its “Required” properties. Provide a name for the step. Select the Microservice from the dropdown list. Navigate to this page to learn how to create a microservice. Click the Save button. Note: Click the "AI Predict" button to have the Copilot add new process steps that match your process description.

- Click the button to configure parameter and value input/output mappings. Provide references to the input and output parameters as variables or globals. Then click the Save button.

- Save the process definition. Generate a new instance. Provide the variable values and execute the process instance. The instance runs in the background, and a confirmation message appears in the top-right corner. Click the “View Instance” hyperlink to render the instance.

- The process step should invoke the microservice “AddingTwoNumbers” and store the output in the variables or globals specified in the output parameters.

- Navigate to the Status - Logs - Microservice Call Logs menu. Select the filter to view the microservice call log event, as shown in the example below.

Definition Sample:
You may download the sample definition(s) from the link provided and later import them (drag-and-drop) into your FlowWright Process Definition (XML file) or Form Definition (HTML file) page.
Note: Please verify and complete the process steps for any missing configurations, such as file path references and database connections, after the import. Then, save the definition to confirm the changes.
Click here to download and extract the ZIP file.