Microservices are gaining popularity these days. Build a process definition and turn it into a Microservice—it's that simple. It’s a compelling concept, but very easy to implement using FlowWright. The UI lets you manage Microservices, export and import microservice XML files from other FlowWright environments, and understand usage statistics and call logs.
You'll need to navigate to the Integration - Microservices page.

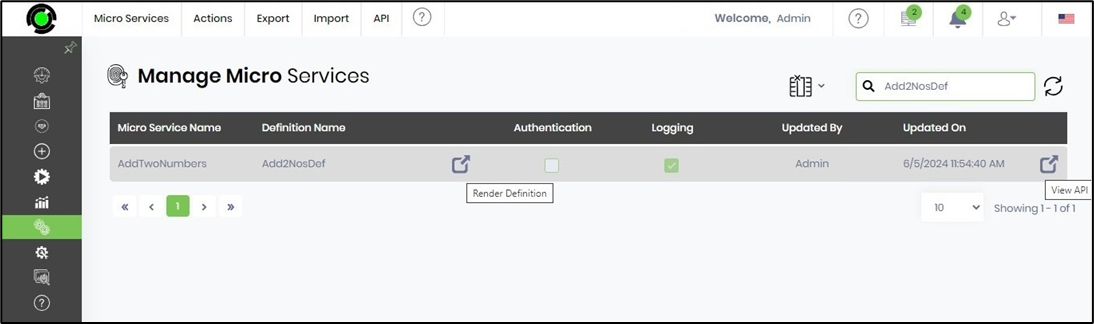
The Manage Micro Services UI is rendered below. A list of microservices is displayed in a table sorted by a column. You may use the Search textbox feature to filter the list.

Select the Actions - Create menu option to create a new microservice. You can navigate to the Edit, Remove, and Copy menu options.

Select a Microservice from the table and click the Export menu to generate and download the XML or SQL files. You may use the XML or SQL files to create a microservice on the target FlowWright environment.

Select the Import menu and choose the XML file from the local folder to import the Microservice.

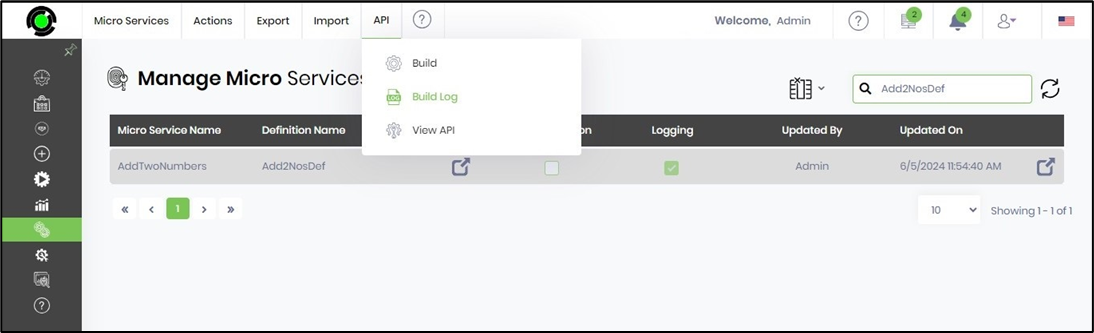
Select the API menu to build the Microservice after configuration. The Build Log provides information during the build process. Using the View API menu option, you can view the Microservice APIs as a Swagger document.

Create a Microservice.
The Microservice UI allows you to define, update, remove, and copy. In the FlowWright application, the Microservice requires a process workflow to execute. Let’s create a Microservice that takes two numbers and returns their sum.
Build a process definition called “add2NosDef,” and configure 3 variables as shown below:

Drag an “evaluateExpression” step to the process designer and connect it to the “Start” step:

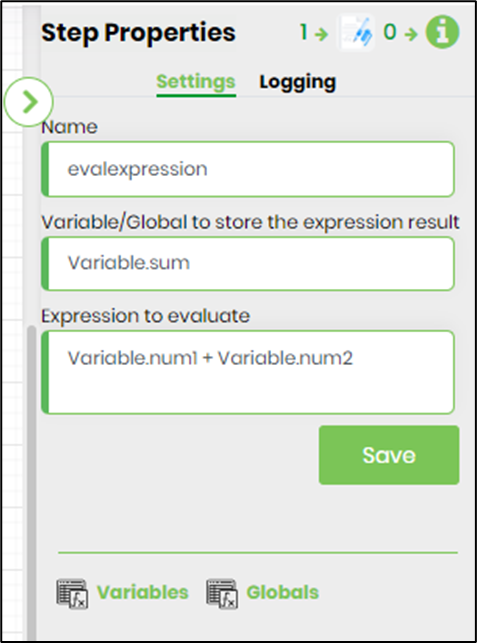
Configure the “evaluateExpression” step with the following values:
Once configured, save the process definition and navigate to the Microservices UI to create a new Microservice:
A pop-up window is displayed for configuration. Provide a name and description for the microservice. Configure the HTTP method to GET or POST. If you want users to authenticate to use the API, you may configure Authentication = On. You can also configure Logging = On to record log events on the Microservice Call Logs page.

You may limit the Microservice access to all users or specific users/application roles. Only users with access privileges can now execute the Microservice. The below UI demonstrates the access configuration as an example. Note: Configuring one user or application role is mandatory.

Select the process definition from the drop-down list. Select ON to save the process instance when the Microservice is executed.

You must map variables or globals from the Microservice to the process definition. To map inputs, select the variable/global from the drop-down list. Provide the input name and description. Click the Add button. You may add multiple inputs with different variable/global list selections. To map outputs, select the variable/global from the drop-down list. Provide the output name and description. Click the Add button. You may add multiple outputs with different variable/global list selections.

In the example below, the Microservice has been configured to use the HTTP Post method. You may pass the values using the Form Body by selecting the checkbox. Note: You must use the POSTMAN utility to execute APIs using the HTTP POST method.

Click the Create button. The microservice is saved, and a confirmation message is displayed in the top-right corner.

Once the Microservice is created, select the “API - Build” menu item. The microservice is built, and the FlowWright application restarts in the background. You need to re-login to continue this setup. The Microservice is now ready for use.

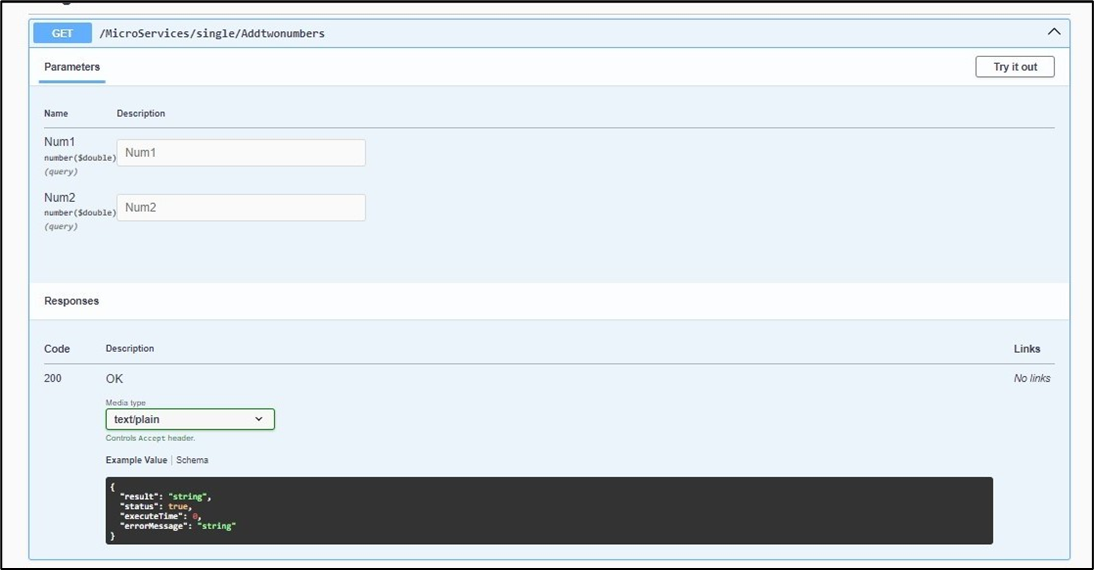
To test the Microservice API in Swagger (inside FlowWright), you must select the API - View API menu option. The API is rendered in Swagger as below. Click the “Try it out” button to execute.
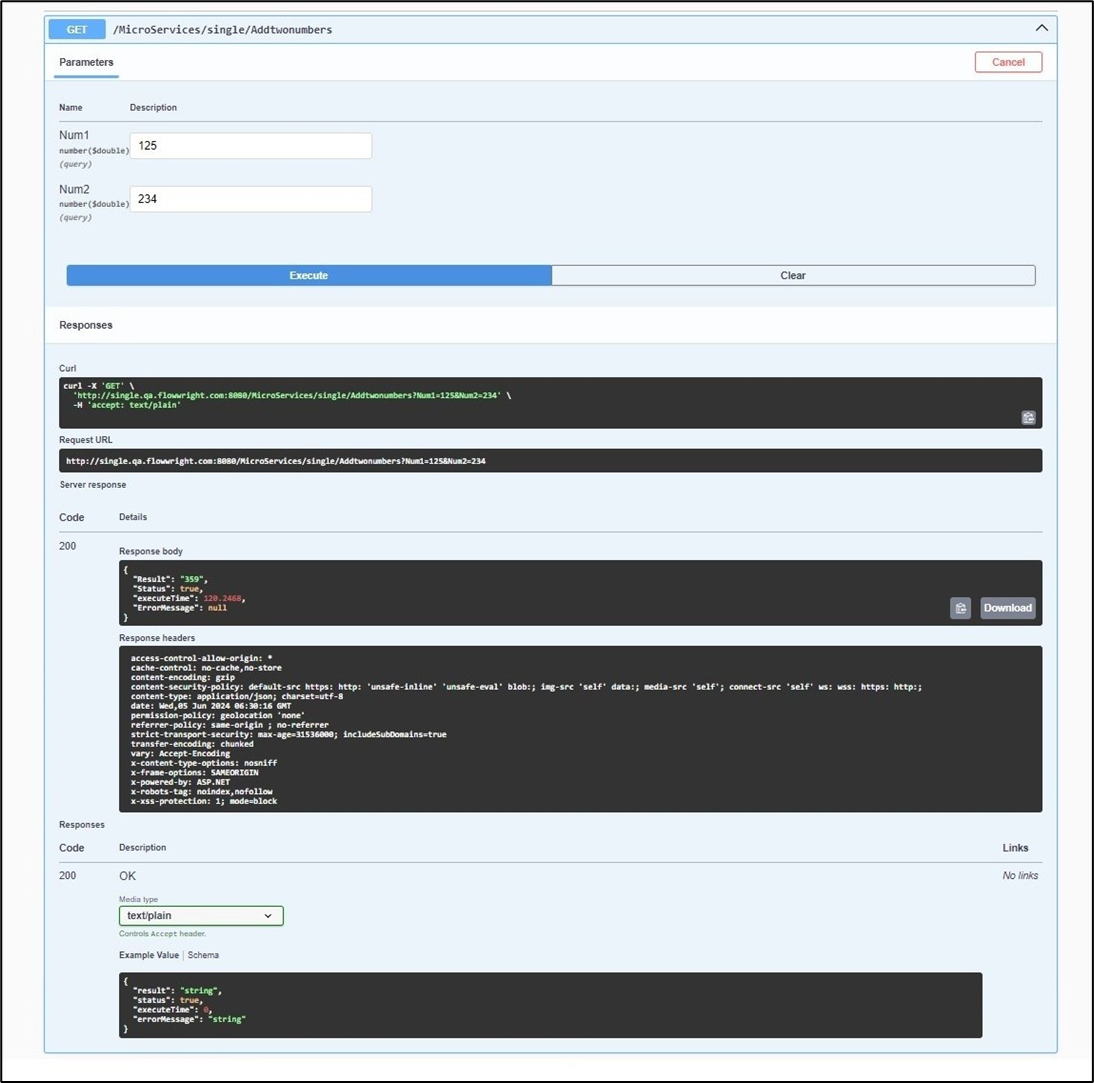
The Microservice used in this example requires two input values. Click the Execute button. The API call is executed in the background, and the result is posted on the same page below. Note: This Swagger UI supports only HTTP GET methods. You may use the POSTMAN utility to execute the HTTP Post method when the Microservice is available.
The user can now view the ‘Build log’ directly, as well as Statistics (By User and By Microservice) and ‘View Call Logs’ under the API menu.
You can use the navigation icons to render the Definition and view the API on the new page.
Click on the API menu and observe the ‘Build log’ and ‘View API’ feature options.
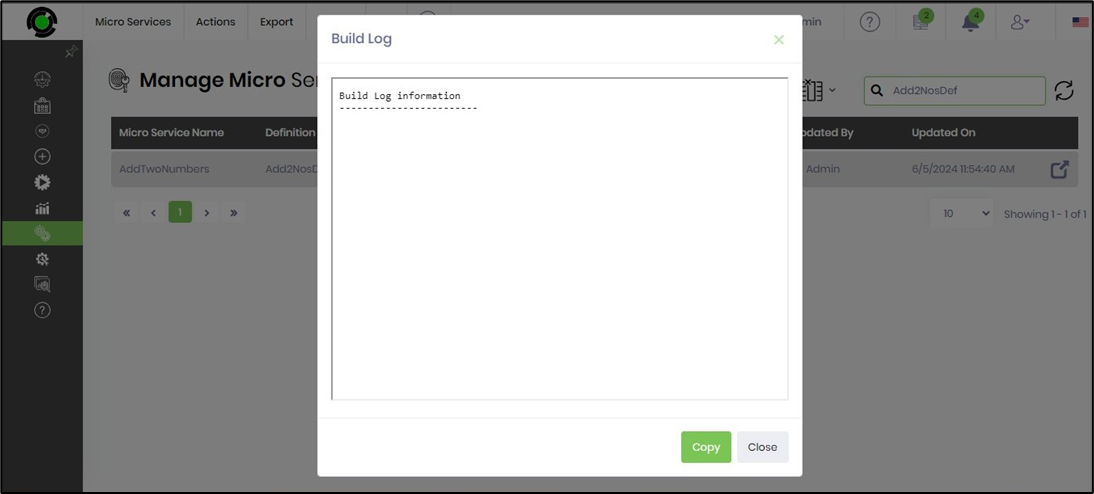
The build log has information about any errors; otherwise, it's empty.
All dates/times are stored in the database as UTC and displayed based on the user's local time zone.
Note: Engine runtime data are in ISO + UTC format.
Select API - View API menu option to view the Microservice APIs page.

The Microservices API is listed on the new page, as shown in this example below.
