Description:
The Create Calendar Event workflow step creates an iCal calendar file using the event information configured in the workflow.
The step supports:
- Specifying the event begin date and time.
- Specifying the event end date and time.
- Selecting a time zone.
- Providing an event description.
- Providing a summary of the event details.
- Specifying the event location.
- Selecting participant users.
- Providing participant email addresses.
- Using workflow-generated values for event information.
- Returning a True or False result for subsequent workflow processing.
Inputs
- beginDate – The Event begin date and time property specifies when the calendar event begins.
- endDate – The Event end date and time property specifies when the calendar event ends.
- timezone - The Select time zone property specifies the time zone associated with the calendar event.
- description – The Description of the event property specifies the event description.
- summary – The Summarize the event details property specifies the summary or detailed content associated with the event.
- location – The Event location property specifies where the event will take place.
- emailTo – The Select participant users property specifies the FlowWright users who should participate in the calendar event.
- emailAddresses - The Email addresses of participant users property specifies participant email addresses.
Returns
- True – The True return path can be connected to the next workflow activity when the calendar-event creation operation succeeds.
- False – The False return path can be used for an alternative workflow path or error-handling logic when the operation does not succeed.
Usage:
The Create Calendar Event step is typically placed after a workflow has determined the date, time, participants, and other information required for a calendar event.
A typical workflow pattern is:
Determine Schedule → Create Calendar Event → Continue Process
The workflow can supply event information from Variables, form values, database results, approval information, or other workflow activities.
The step can be used to:
- Create calendar events for scheduled business activities.
- Create meetings following an approval.
- Generate calendar events from form submissions.
- Schedule appointments based on workflow data.
- Include selected FlowWright users as participants.
- Supply participant email addresses.
- Create calendar events containing dynamic workflow information.
- Generate an iCal calendar file for downstream processing.

Typical Workflow Suggestions:
Create a Calendar Event After an Approval
Use the step when an approved request should result in a calendar event.
Example:
Submit Request → Approval → Create Calendar Event → Notify User
For example:
Description:Customer meeting
Location:Conference Room A
Participants:Selected FlowWright users
This lets the workflow create the calendar event after the required approval is complete.
Create an Event from Form Information
Use form values to populate the calendar event.
Example:
Meeting Request Form → Create Calendar Event → Continue Process
Form values can provide:
- Meeting start date/time.
- Meeting end date/time.
- Meeting description.
- Meeting location.
- Participants.
This lets you reuse a workflow to create calendar events based on submitted information.
Schedule a Customer Meeting
Use the step to create a calendar event when a customer meeting needs to be scheduled.
Example:
Get Customer Information → Determine Meeting Time → Create Calendar Event
Example event:
Description:Customer Review Meeting
Location:Customer Office
Participants:Account Manager, Customer Representative
Workflow Variables can be used to populate customer-specific information.
Create an Internal Meeting
Use the step to schedule an internal meeting for selected FlowWright users.
Example:
Identify Participants → Create Calendar Event
Configure the Select participant users property with the appropriate FlowWright users.
The event can include a subject or summary, date/time, and location.
Specify a Time Zone
Use Select time zone when the event needs an explicit time-zone setting.
Example:
Determine Meeting Time → Create Calendar Event
Configure:
Select time zone:Appropriate event time zone
This can be particularly useful when workflow participants or business operations span different geographic locations.
The XML exposes the time zone as an optional property using the TimeZoneList data type.
Create a Dynamic Event Summary
Use workflow information to build the event summary.
Example:
Retrieve Request Data → Create Calendar Event
Summary:
Review meeting for Request {{RequestID}}
Description:
Customer: {{CustomerName}}
Request: {{RequestID}}
Status: {{Status}}
This allows the same workflow configuration to create context-specific calendar events.
Create Events with Dynamic Locations
Use workflow-generated values for the event location.
Example:
Determine Meeting Location → Create Calendar Event
Possible locations might include:
- Conference Room A
- Conference Room B
- Customer Office
- Remote Meeting
- Training Center
The location is a required property in the supplied XML.
Add Selected FlowWright Users as Participants
Use Select participant users when participants are FlowWright users.
Example:
Determine Approvers → Create Calendar Event
Participants:
- Request Owner
- Manager
- Project Manager
The participant-user property is required according to the XML definition.
Provide Participant Email Addresses
Use participant users' email addresses when you need to supply email addresses as part of the event configuration.
Example:
Retrieve Participant Information → Create Calendar Event
Email addresses:
manager@example.com
customer@example.com
projectmanager@example.com
Create a Training Event
Use the step to create calendar events for scheduled training.
Example:
Training Request → Approval → Create Calendar Event
Example:
Description:FlowWright Administration Training
Location:Training Room
Participants:Selected trainees
The start and end date/time properties can be populated from the approved training schedule.
Create an Appointment from a Workflow
Use this step when a workflow manages appointments.
Example:
Appointment Request → Validate Availability → Create Calendar Event
The workflow can supply:
- Appointment start.
- Appointment end.
- Appointment location.
- Participant users.
- Event description.
Create a Follow-Up Meeting
Use the step when a completed workflow activity should result in a follow-up meeting.
Example:
Complete Review → Create Calendar Event → Send Notification
Example:
Description:Follow-up Review
Location:Meeting Room 2
Summary:Follow-up discussion for {{RequestID}}
Create a Calendar Event for a Deadline
Use the step to create an event associated with an important workflow deadline.
Example:
Determine Deadline → Create Calendar Event
The event can communicate the deadline or scheduled activity to the relevant participants.
Handle Calendar Event Creation Failure
Use the True and False return paths to handle the operation result.
Example:
Create Calendar Event
→ True → Continue Process
→ False → Log Failure / Notify Administrator
This allows the workflow to handle unsuccessful event creation separately from normal processing.
Example:
Let’s build and execute the “createCalendarEventDef” example.
- Create a new process definition named “createCalendarEventDef” and open it in designer mode.
- Drag a "createCalendarEvent" step to the canvas.
- Connect the dots between the “Start” and "createCalendarEvent" steps, as shown above.
- Select the line between the steps to configure the “Connection Properties”. The default property values are “None, True, False, Error, and Evaluate”. Depending on the step’s purpose, you can configure additional values.
- Click the "createCalendarEvent" step to configure its "Required" properties. Provide a name for the step. Enter the event's start and end dates and times. Select the time zone from the dropdown list. Enter a description for the event. Enter the event location. Click the Save button. Note: Click the "AI Predict" button for the Copilot to add new process steps that match your process description.

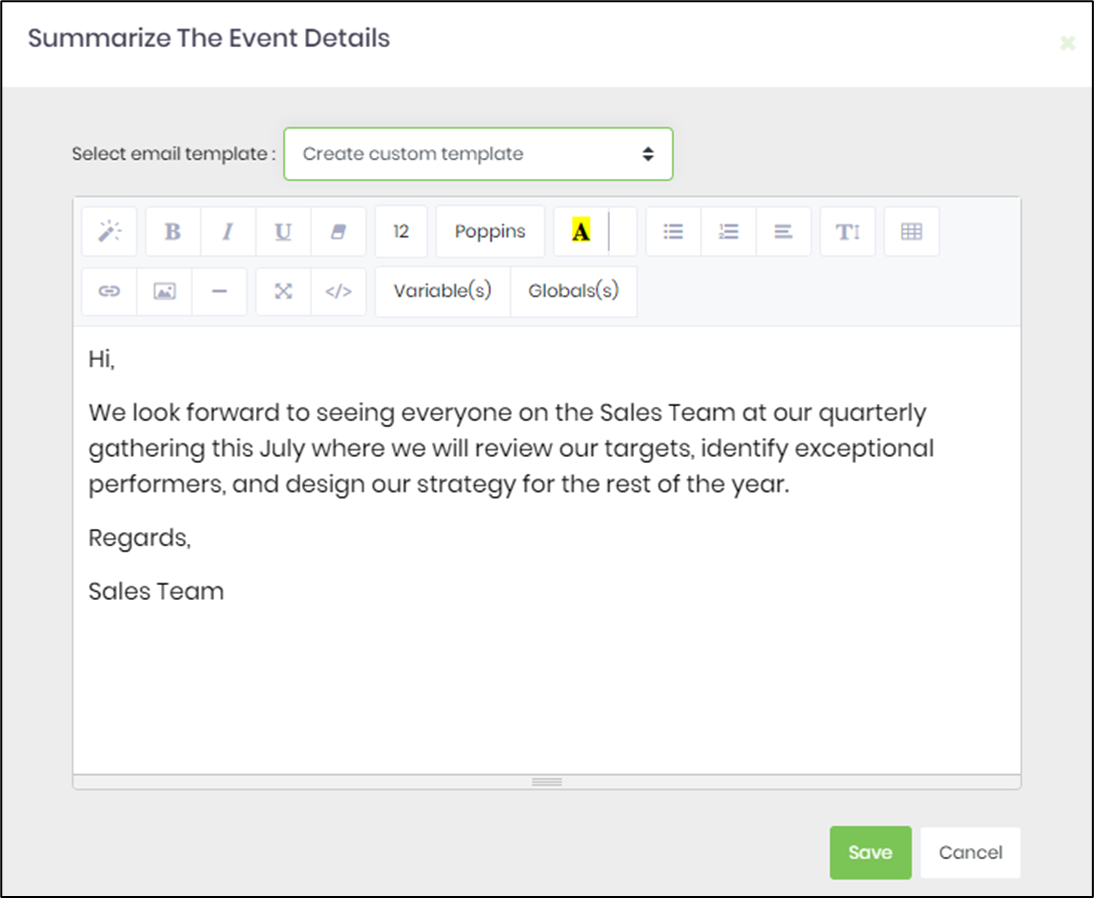
- Click the button to summarize the event details. After summarizing the event details, a Template popup will open. Fill out the template design to match your requirements, or select an existing template from the dropdown.
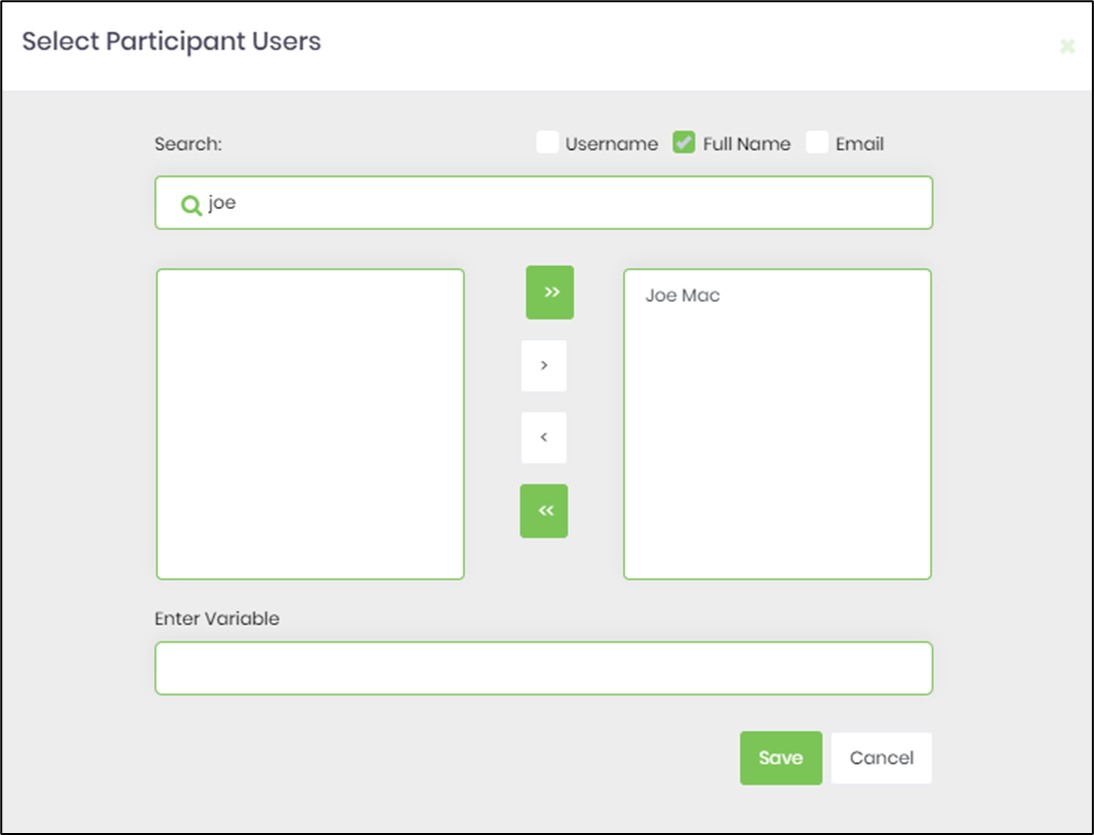
- Click the button to select participant users.
- Click the "createCalendarEvent" step to configure its "Optional" properties. Enter the email addresses of external participants, separated by semicolons.

- The “Logging” configuration is necessary for documentation and also measures workflow progress and percent complete. Configure the step state and percent fields individually, as shown below. Configure the “Logging” using the following properties.

- Save the process definition. Create a new process instance and execute it. Render the process instance and select the Create Calendar Event step to view its properties and execution information. When the workflow reaches the step, FlowWright uses the configured date/time, time zone, event information, location, and participant information to create the calendar event. If the operation succeeds, the workflow follows the True path. If the operation does not succeed, the workflow can follow the False path for alternate processing or error handling.
Tips:
- Always provide a valid Event begin date and time.
- Always provide a valid Event end date and time.
- Verify that the end date/time matches the event's intended duration.
- Select an appropriate time zone when the event requires explicit time-zone information.
- Provide a meaningful event description.
- Use the Summary property to clearly communicate the purpose and details of the event.
- Provide a meaningful event location.
- Select the intended participant users carefully.
- Verify participant information before executing the step.
- Use workflow Variables to populate dynamic event information.
- Use consistent date/time handling throughout the workflow.
- Test events across relevant time zones when the workflow operates across geographic regions.
- Test events with different start and end times.
- Test events that span different dates.
- Verify participant information before deploying the workflow.
- Use meaningful event descriptions so recipients can understand the purpose of the event.
- Keep sensitive information out of event descriptions and summaries when the event may be distributed outside FlowWright.
- Test the workflow after changing the participant configuration.
- Test the False return path and provide appropriate error handling.
- Verify the generated calendar event using the actual FlowWright runtime behavior.
- Do not assume a particular calendar application or external calendar service is automatically updated unless that behavior has been confirmed.
- Do not assume a specific email-address delimiter or parsing format for Email addresses of participant users without confirming the FlowWright implementation.
- Do not assume the output location or filename of the generated iCal file from the XML alone.
- Verify the behavior of the optional time-zone property in the target environment.
Definition Sample:
You may provide a sample CreateCalendarEventDef process definition for users to download and later import into their FlowWright Process Definition.
After importing the sample, verify and complete any missing configuration, including:
- Event begin date and time.
- Event end date and time.
- Time zone.
- Event description.
- Event summary.
- Event location.
- Participant users.
- Participant email addresses, if required.
- Workflow Variable references.
- Environment-specific calendar or email configuration.
- Downstream True and False workflow paths.
After verifying the configuration, save the Process Definition before execution.
Click here to download the sample file.