Description:
This step retrieves the task's file attachment info path. These files are accessed from the file system on the application server or the DMS file storage folder, whose configuration is defined in the “Start” process step.
Inputs
- taskStepID – Select Task Step
- resultFormat – Result Type
- taskFileAttachments – Variable / Global to hold the task file attachments path in XML / JSON
Returns
- True – true condition
- False – false condition
Usage:
Example:
Let’s build and execute the “getTaskFileAttachmentsDef” example.
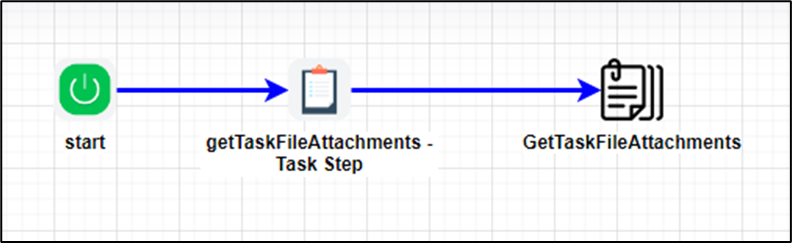
- Create a new process definition named “getTaskFileAttachmentsDef” and open it in designer mode.
- Drag a “Task, getTaskFileAttachments” step to the canvas.
- Connect the dots between the “Start” and other steps, as shown above.
- Define a variable or a global variable to store the attachment file path information.
- Click the “Task” step to configure its “Required” properties. Enter a name and a task description. Click the Save button. Note: Click the "AI Predict" button to have the Copilot add new process steps that match your process description.

- Click the “Task” step to configure its “Optional” properties. Then route the task to yourself or another user. In this case, the system variable “variable.initiatorID” routes the task to the user who initiated the process instance.

- Click the “getTaskFileAttachments” step to configure its “Settings” properties. From the drop-down list, select the Task step. From the list, select the result type, either XML or JSON. Provide a variable or a global reference to store the file attachment path. These files are accessed from the file system on the application server or the DMS file storage folder, whose configuration is defined in the “Start” process step. Click the Save button. Note: Click the "AI Predict" button for the Copilot to add new process steps that match your process description.

- The “Logging” configuration is necessary for documentation and also measures workflow progress and percent complete. This is achieved by configuring the step state and percent fields individually, as shown below. Configure the “Logging” using the following properties.

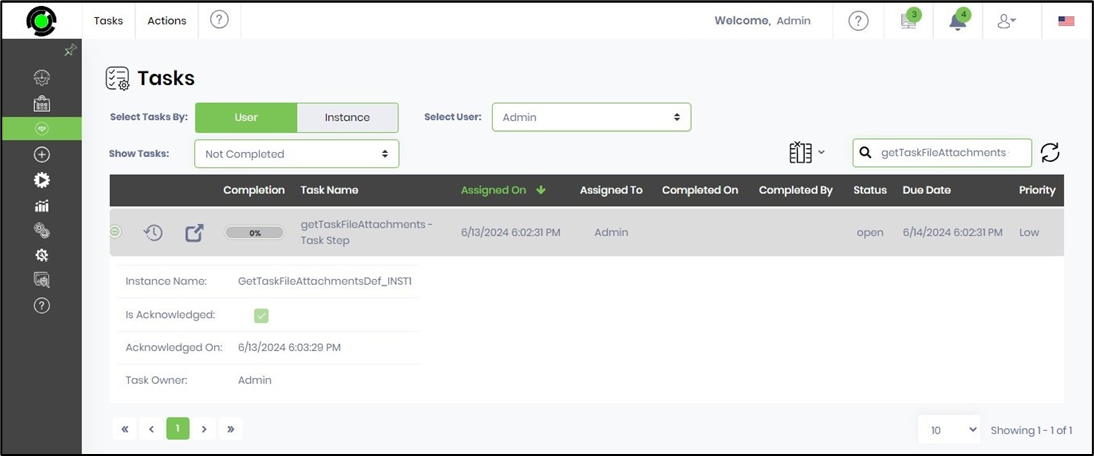
- Save the process definition, create a new instance, and then execute it. The task is assigned to the configured user. Navigate to the “Engage > Task” page to view the task or use the task notification. Click the task row to open it.
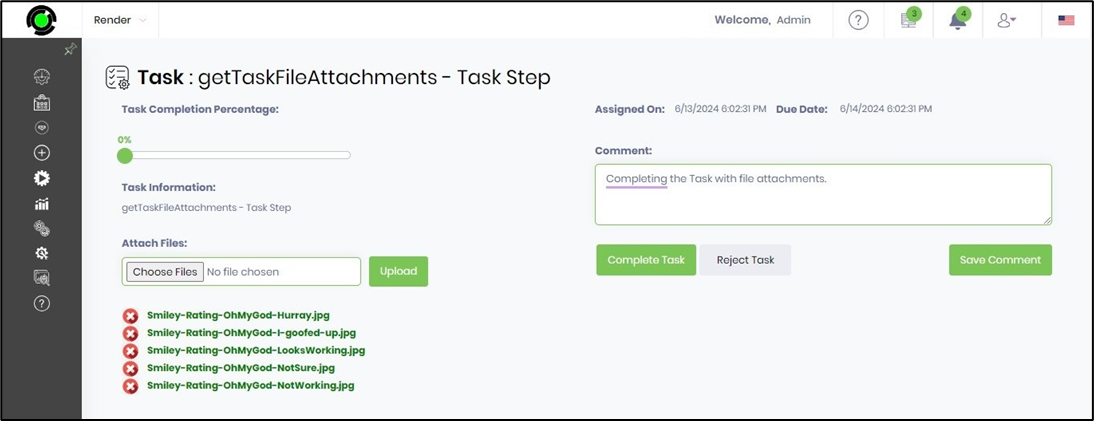
- The user can attach files to the task, select the return value, and provide comments. The task can be saved incrementally using the “percentage scroll bar” and the “Save Comment” button. Note: The files attached to the task are stored in the application server's file system or in the DMS file storage folder, whose configuration is defined in the “Start” process step. The user clicks the “Complete Task or Reject Task” button to complete this task, and the process instance advances to the next step in the workflow.
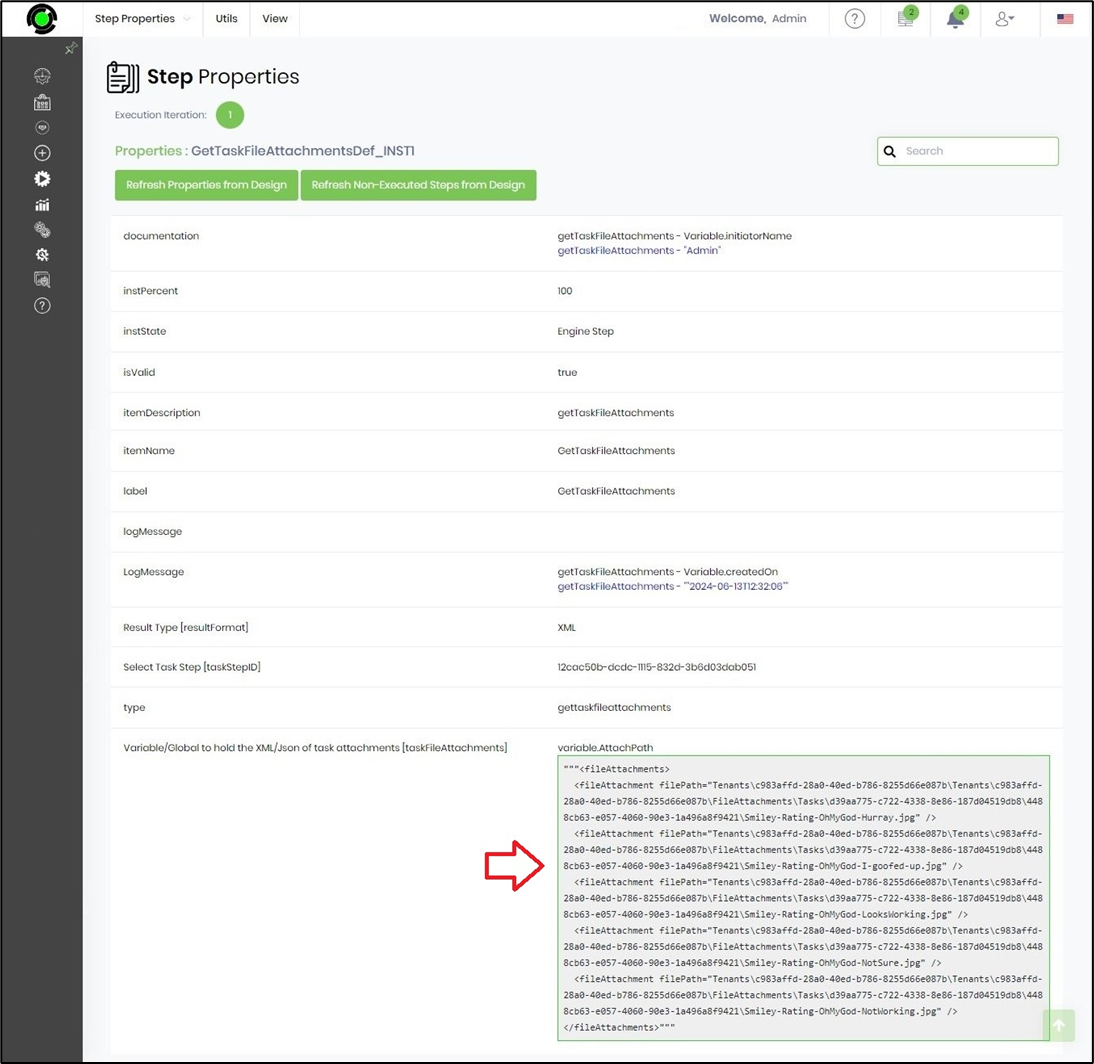
- The task is completed, and the process moves to the getTaskFileAttachments step in the workflow. The file attachment path is retrieved and stored in the provided variable or global reference. The process is complete.
- Navigate to the "Process Instances" page. Select the process instance and render it to view. Click the “getTaskFileAttachments” step to view its properties. The step retrieves the file paths of the attachments added to the task. These file paths refer to the files stored in the application server's file system or in the DMS file storage folder, whose configuration is defined in the “Start” process step.
Definition Sample:
You may download the sample definition(s) from the link provided and later import them (drag-and-drop) into your FlowWright Process Definition (XML file) or Form Definition (HTML file) page.
Note: Please verify and complete the process steps for any missing configurations, such as file path references and database connections, after the import. Then, save the definition to confirm the changes.
Click here to download the sample file.