1. Welcome
Welcome to the FlowWright Configuration Manager User Guide for Version 10.8. This guide describes how to use the FlowWright user interface to interact with the product's features. This guide is one of many guides provided by FlowWright. All documentation is available within the product under the “Help” menu. This help documentation now points to documentation.FlowWright.com
Refer to the Tenant Manager user guide in the Help section for information on multi-tenant environments. This guide applies to standard installations and features/functions within each tenant.
2. Change Language
FlowWright supports multiple languages. If globalization is configured and available, the login screen will include the following drop-down to change the language of the login screen:

2.1 Cookie Consent
The FlowWright website uses cookies to ensure the best user experience. The user provides their consent by clicking on the "Got it, I agree" button on the login screen. The "Learn More" link connects to the privacy policy on the FlowWright website.

2.2 Login
Select Forms Authentication to navigate to the user login screen, which lets you log in to FlowWright.

The default login information for FlowWright is as follows.

Upon successful login, the application dashboard is rendered.
Note: Each user's last login date and time are tracked. A history entry is also recorded for any login to the UI or the REST API. Any failed user logins are logged in the system log.
2.3 Forgot your password
Users can reset their passwords by clicking the “Forgot Password” link.

User must enter the “email address” and confirm RESET.

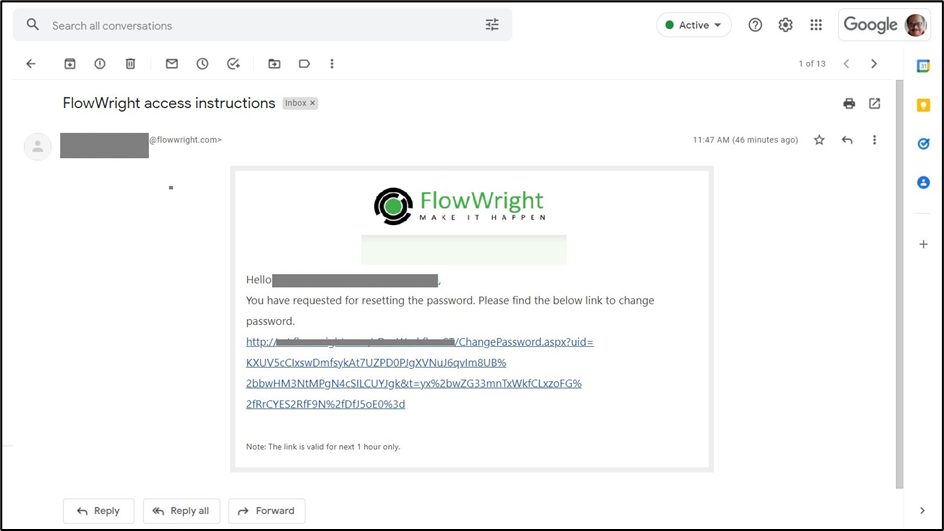
A password reset sends a link to change the password rather than sending the new password by email.

This reset link is valid for only 1 hour.
2.4 User access request
Users can request access to FlowWright through the login screen by clicking the “Request Access” link:

The following dialog will be displayed to the user. Provide the user information and click the “Create Request” button.

An access request process is initiated in the background, and a confirmation message is shown to the user.

You may see an “Application Offline” message if the database service is unavailable.

2.5 After login
After logging in, the user interface is rendered based on your user account type (Admin or Regular User). By default, the dashboard displays the FlowWright menu on the left side of the interface. The new menu is informed by the business process management life cycle.
Here, the application displays the Admin Dashboard as configured.

Here, the application renders the User Dashboard as configured.

For FlowWright Administrator users.
In the left-hand menu, the Workflow Management and Configuration options are organized into the following sections: “Dashboard, Engage, Applications, Process, Forms, ETL, DMS, Manage Config, Analytics, Integration, Administration, Status, and Help."

2.6 Workflow / Process Management
All users can access the Workflow management menu to manage workflow processes, forms, tasks, reports, and business intelligence. The Workflow management menu is structured as follows:

2.7 Workflow / Process Configuration
Only administrative users can access the Workflow configuration. The Workflow configuration lets you manage all settings for FlowWright building blocks, including the steps required to create workflow definitions. Form widgets help you build form documents and form instances. All FlowWright configurations are managed through this user interface:

3. Dashboards
After logging in to FlowWright, the UI defaults to the dashboard. In this example, the dashboard provides a high-level view of key areas of FlowWright, including the number of open tasks, process definitions, process instances, form definitions, form instances, and users. The UI also displays several graphs showing the week's statistics.

4. Header Panel
The header panel includes the application logo, information items, the currently logged-in user’s name, help, notifications, tasks, a user menu, and language selection options.

4.1 User Tasks
The header displays the tasks assigned to the current user, including the top 10 tasks.

4.2 User Notifications
The header displays user notifications in the notifications area, including those created by the current user, by other users, or through workflows for the current user.

4.3 Language Selection
If multiple languages are supported, the language switcher lets you switch between them. The FlowWright UI will fully switch to display information in the selected language.

5. My profile
My profile lets you manage your name, email, and role details.

The profile information is displayed on the same page.

Use the following screen to change the account password. The strength meter indicates the password's strength.

Use the following screen to view the current user's System Roles in FlowWright:

Use the following screen to view the Application Roles for the current user within FlowWright:

5.1 Product review
Click on the product review menu to review FlowWright.

The Product Review page is rendered in a new tab, as shown below.

Click the “G2 Crowd” icon and submit a survey of the product as shown below:

5.2 My Time Zone
This User Interface allows the user to change the time zone.

The user selects a different time zone from the drop-down list, then clicks the SET button to confirm. The user can reset by selecting the SET BROWSER TIME ZONE button and confirming with the local time zone.
5.3 About
Click on About to check the application version.

5.4 Form Authentication
Note: Using an invalid culture code attribute in the Login URL shall default the application culture to US-EN. For example, xx-YY is an invalid browser culture code. A "browser culture code" refers to the language and region settings a user has configured in their web browser.