Many customers use FlowWright's user interfaces in their applications - using API calls to choose elements (or whole webpages) of the FlowWright UI in their User Interfaces. It is important to those customers for FlowWright UI elements to be consistent in look and feel with their own company and application standards. FlowWright allows you to customize the Flowwright UI to match your organization's UI scheme. FlowWright now lets you change the following:
- Login and application logo image
- Foreground & background colors for different parts of the UI
- Font type
Change UI Theme:
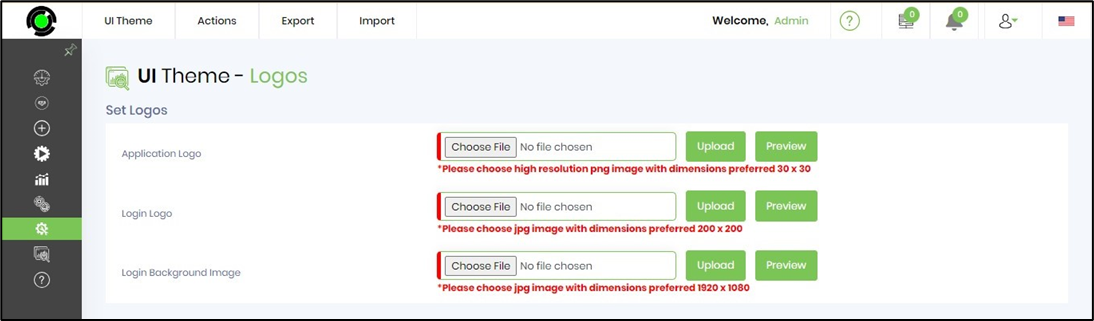
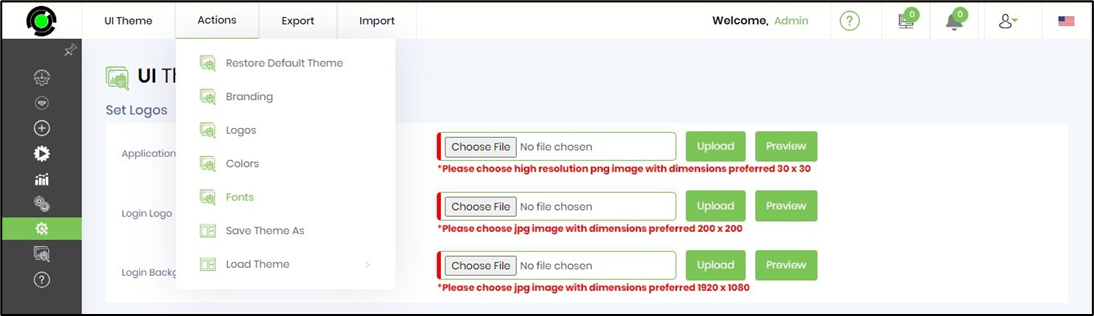
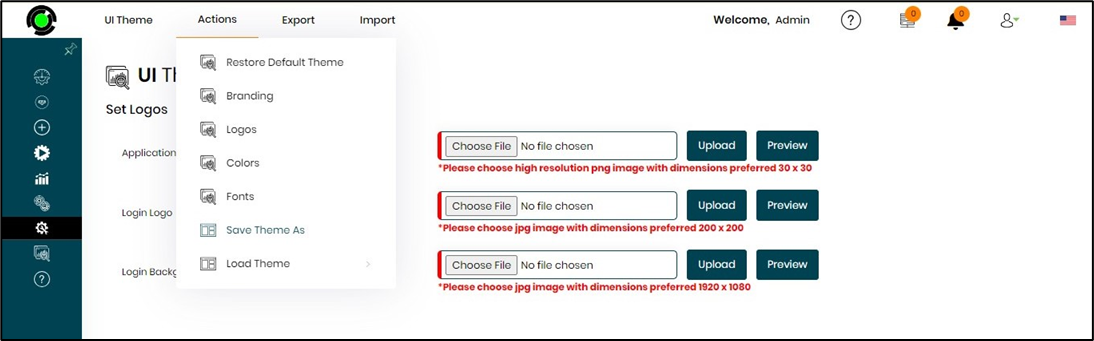
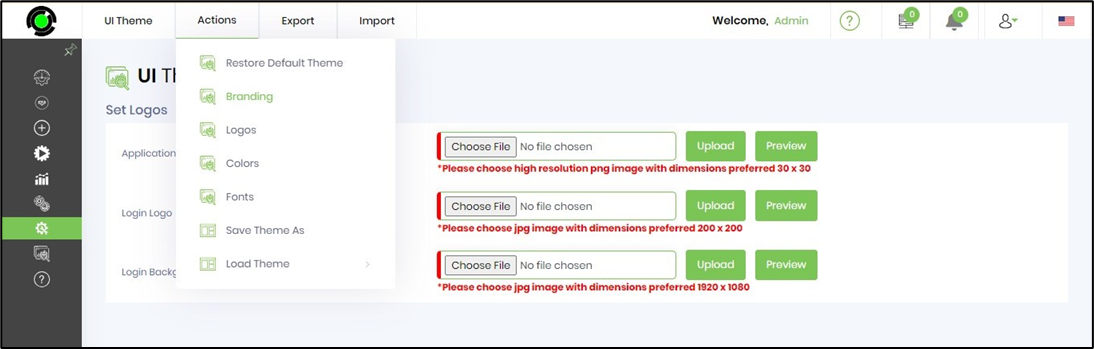
You'll need to navigate to the Administration - UI Theme page. The new menu under the Administration gives you access to various Theme changes to the UI. Using the following, logo images can be changed.
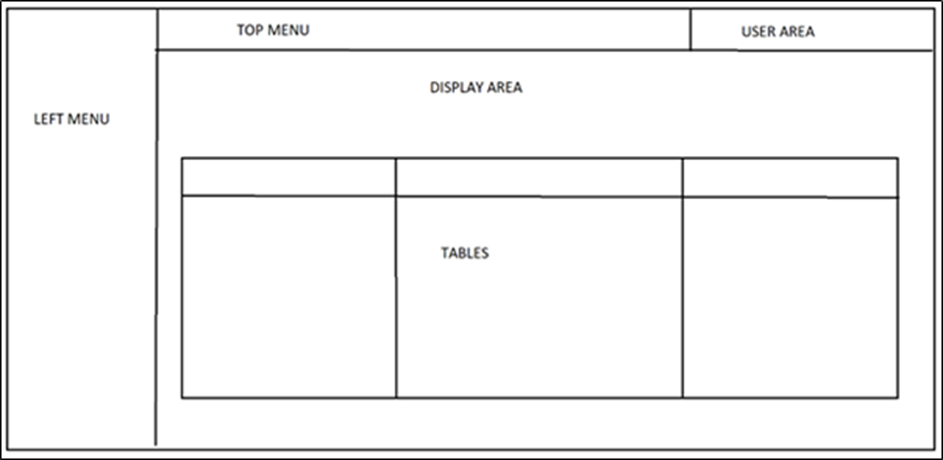
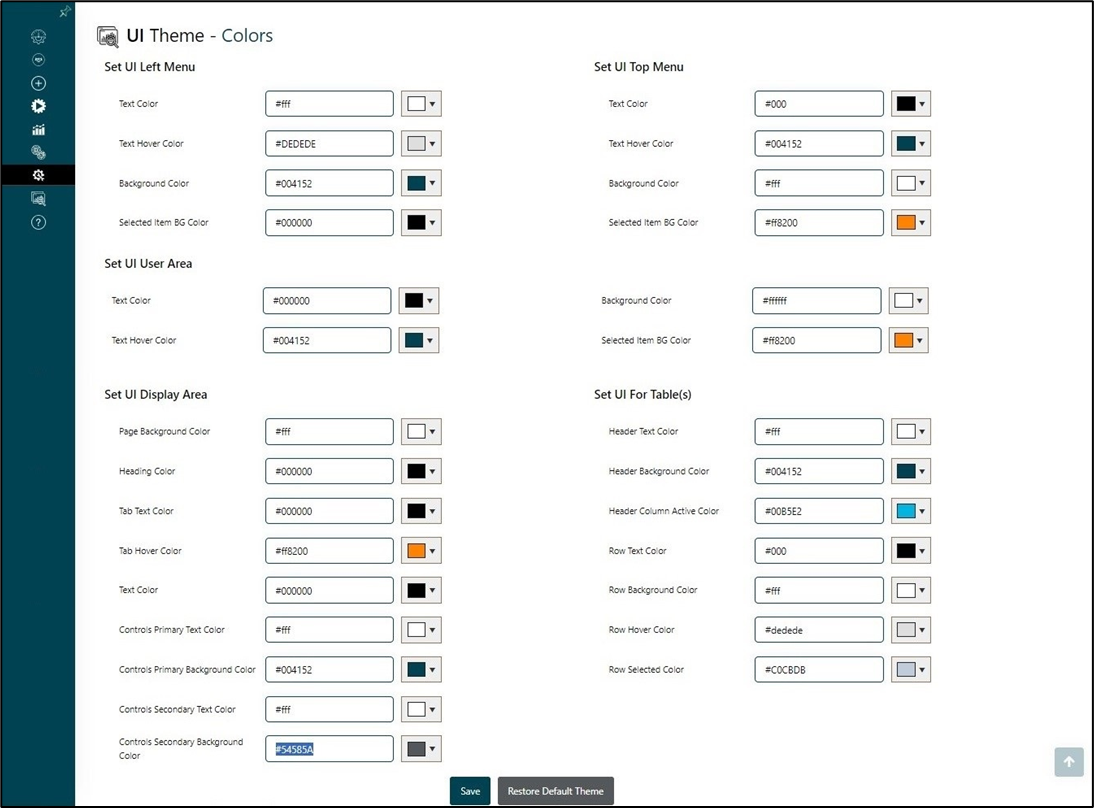
The UI layout is separated into multiple areas and provides granular color changes within each section. The design is as follows:
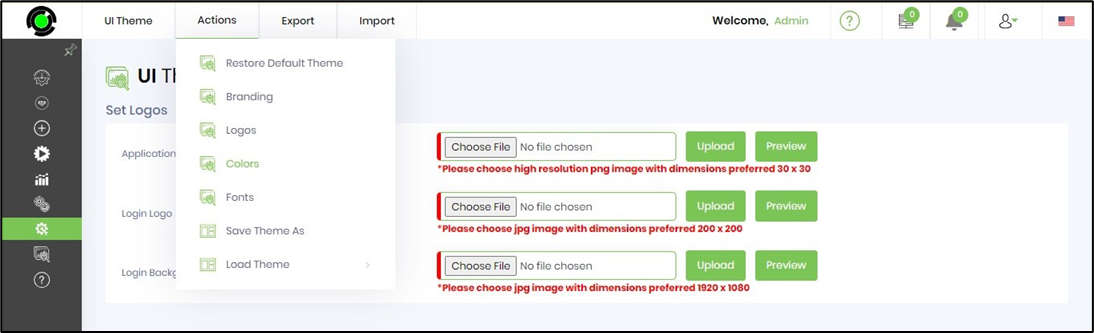
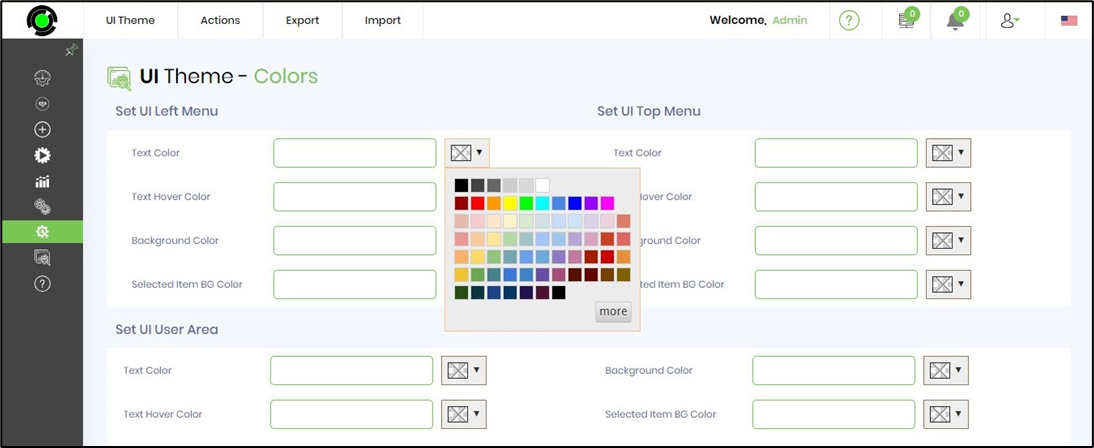
You must navigate the Actions - Colors menu option to change the UI colors.
The UI is rendered as below.
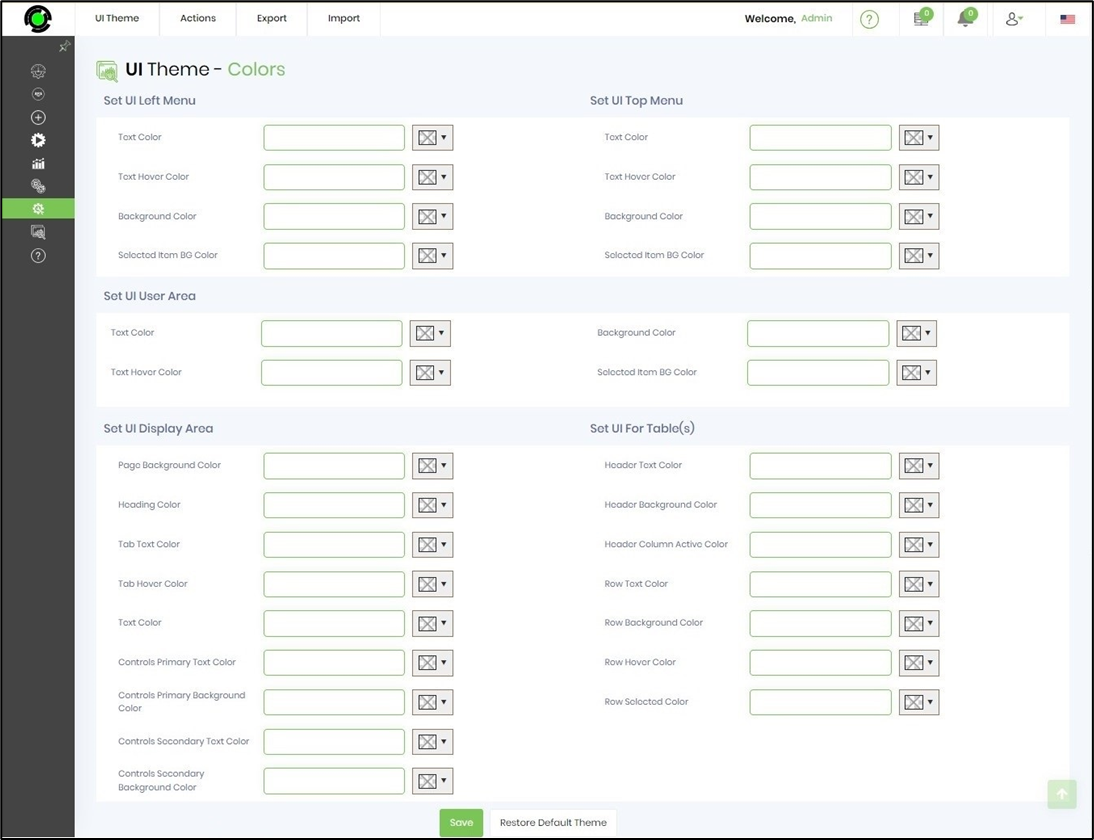
To change the UI Theme Colors, click the drop-down color picker to choose the Text Color. Then, click the Save button at the bottom of the page to confirm the changes. You may make similar actions to define the color themes for the Left Menu, Top Menu, User Area, Display Area, and Tables.
Set Font:
You must go to the Actions - Font menu to change the font style.
The UI is rendered as below.
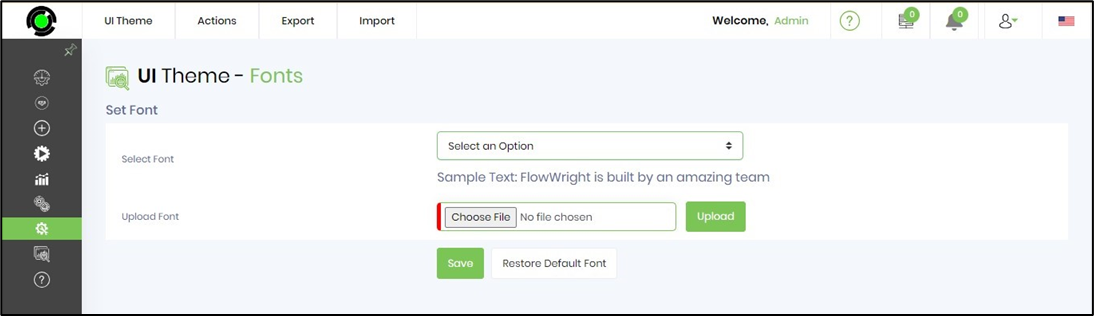
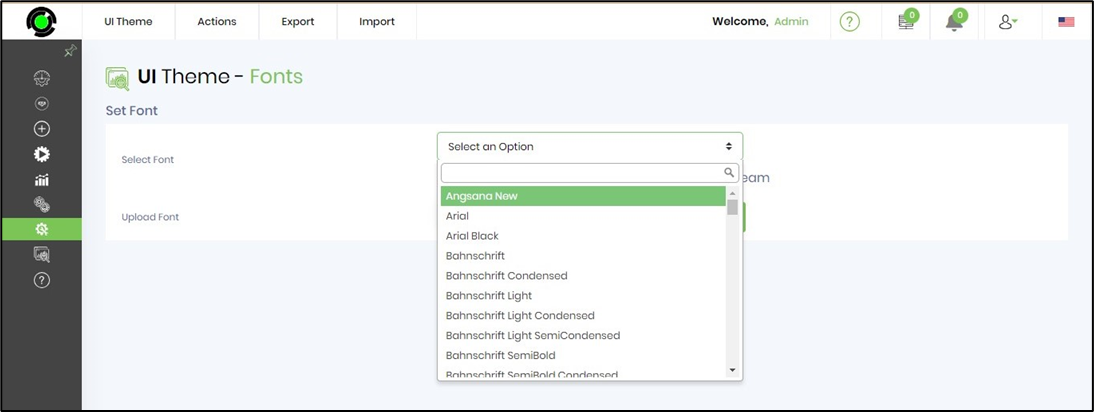
Select the font style from the drop-down list and click the Save button to confirm. The font style changes are applied immediately. If you want to restore the default font, click the Restore Default Font button.
Click the Choose File button to select a custom TTF font type from the local folder and Upload it. Then click on the Save button to confirm the changes.
Save and Load Theme:
To change the colors, navigate to the Actions—Colors menu option. In the example below, the colors are configured for the UI Left Menu, Top Menu, User Area, Display Area, and Tables. Click on the Save button to confirm the changes.
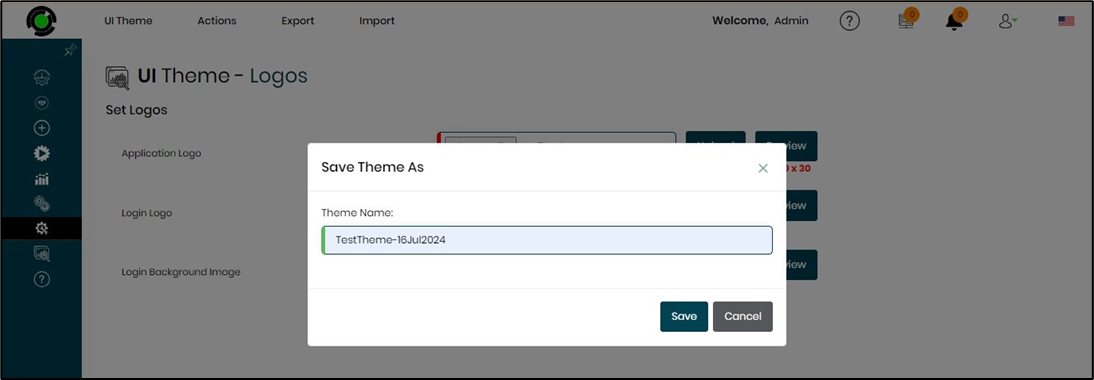
The color changes are applied immediately. Click on the Actions - Save Theme As menu option.
A popup window displays for configuration. You must provide the name and click on the Save button to confirm. The theme is saved, and a confirmation message is displayed in the top right-hand corner.
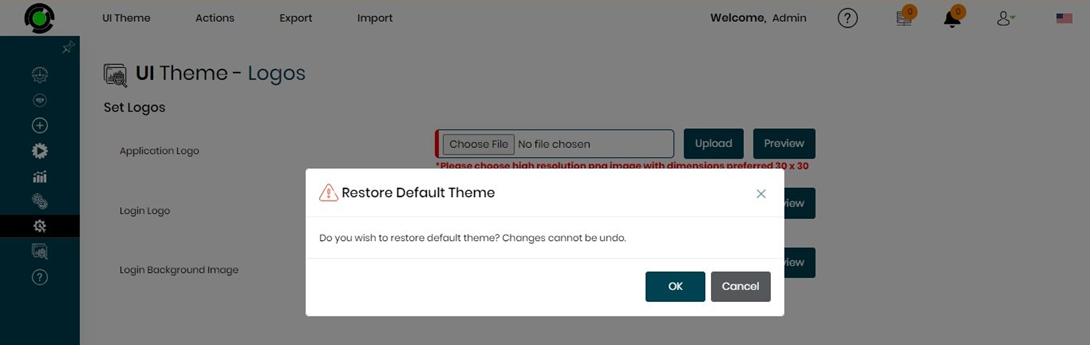
You may restore the default theme by navigating to the Actions—Restore Default Theme menu option. A popup will appear for confirmation. Click OK to continue. The default theme will be restored immediately.
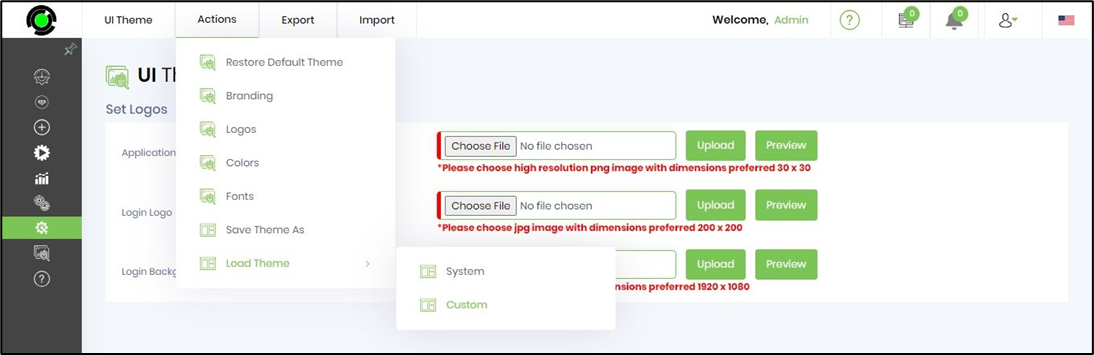
The default UI theme is restored immediately. To load a custom theme, navigate to the Actions - Load Theme - Custom menu option.
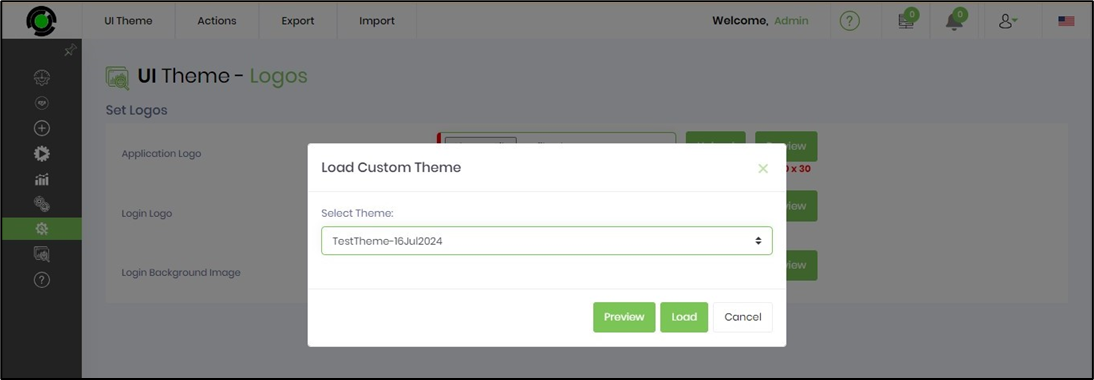
Select the theme from the drop-down list. Click on the Preview button to sample the theme. Click on the Load button to confirm.
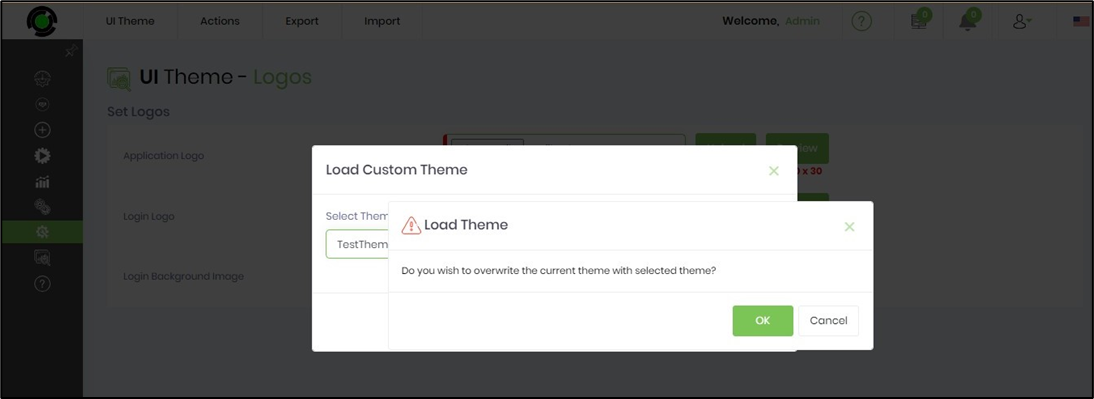
Click on the OK button to confirm. The existing UI theme is replaced on successfully loaded.
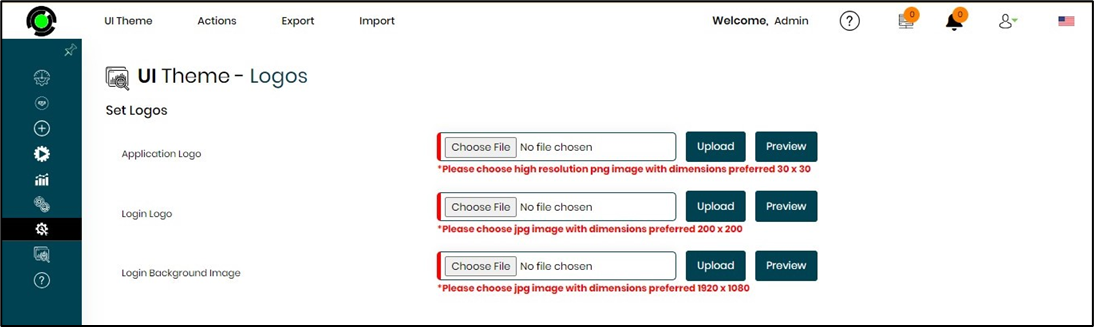
The selected UI theme is rendered as below.
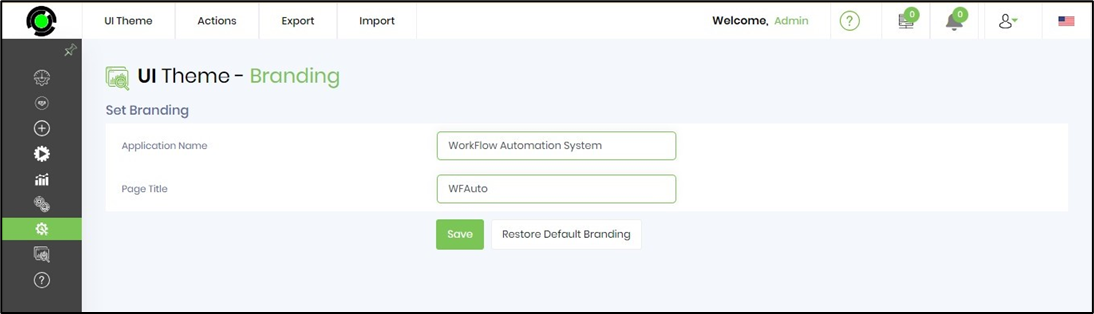
Set Branding:
To change the Application Name and the Page Title, navigate to the Actions - Branding menu option.
You'll need to provide the application name and the page title. Click the Save button to confirm. Then, click the Restore button to restore the default branding.
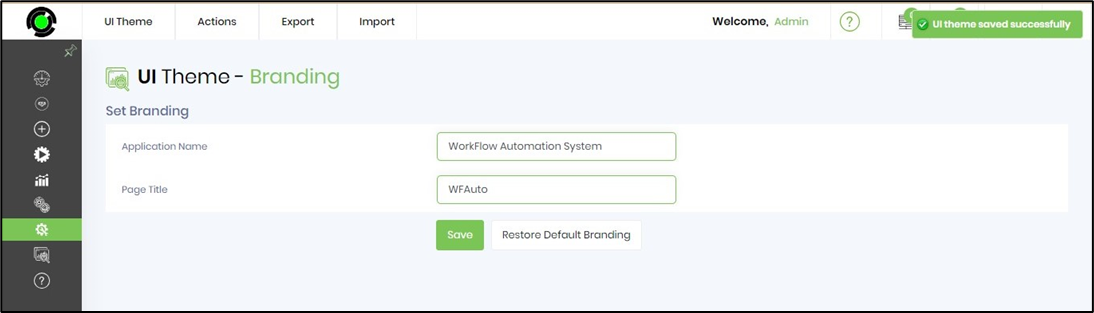
The branding changes are applied, and a confirmation message is displayed in the top right-end corner.
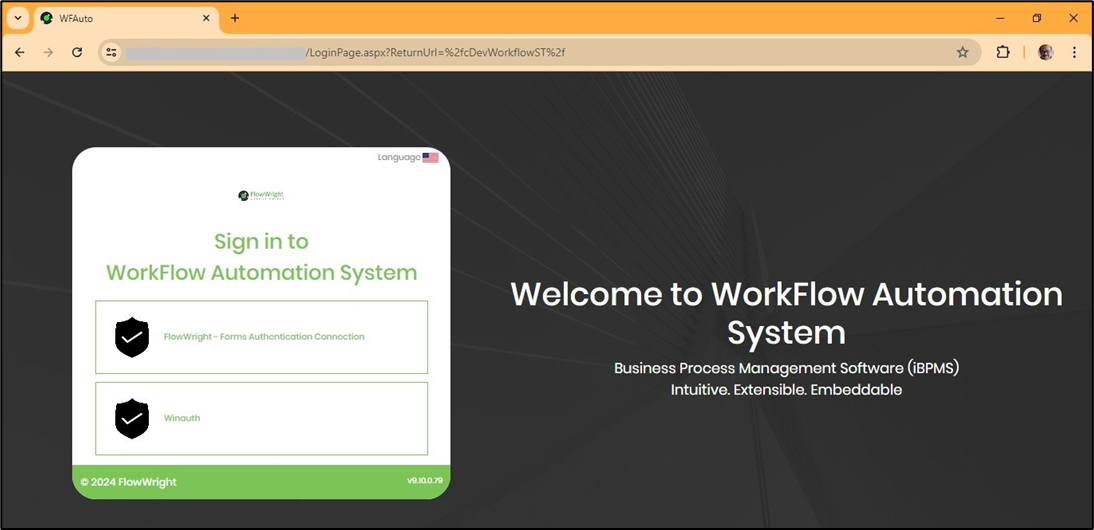
The branding information is visible when the user Signs into the application.
Many Theme choices are provided, so you can easily change your theme to your organizational standards—making white-labeling easy and seamless. White labeling with FlowWright is straightforward: in just a few clicks, FlowWright UI elements are consistent with your application, logos, and color schemes. We understand branding is essential, and this feature makes it easy for you to make FlowWright consistent with your brand.